By the end of this blog post, you will have a thorough understanding of the different wood flooring installation patterns available and be equipped with the knowledge to choose the right one for your home. So, whether you are looking to add a touch of elegance, create visual interest, or make a bold design statement, join us as we explore the world of wood flooring installation patterns.
Understanding the Basics: Different Types of Wood Flooring Patterns
Wood flooring patterns offer a variety of options to suit different design preferences and architectural styles. Before diving into specific installation patterns, it’s important to familiarize yourself with the basics of the different types available. Understanding these variations will help you make an informed decision when choosing the right pattern for your home.
Straight Wood Flooring Pattern: An Overview
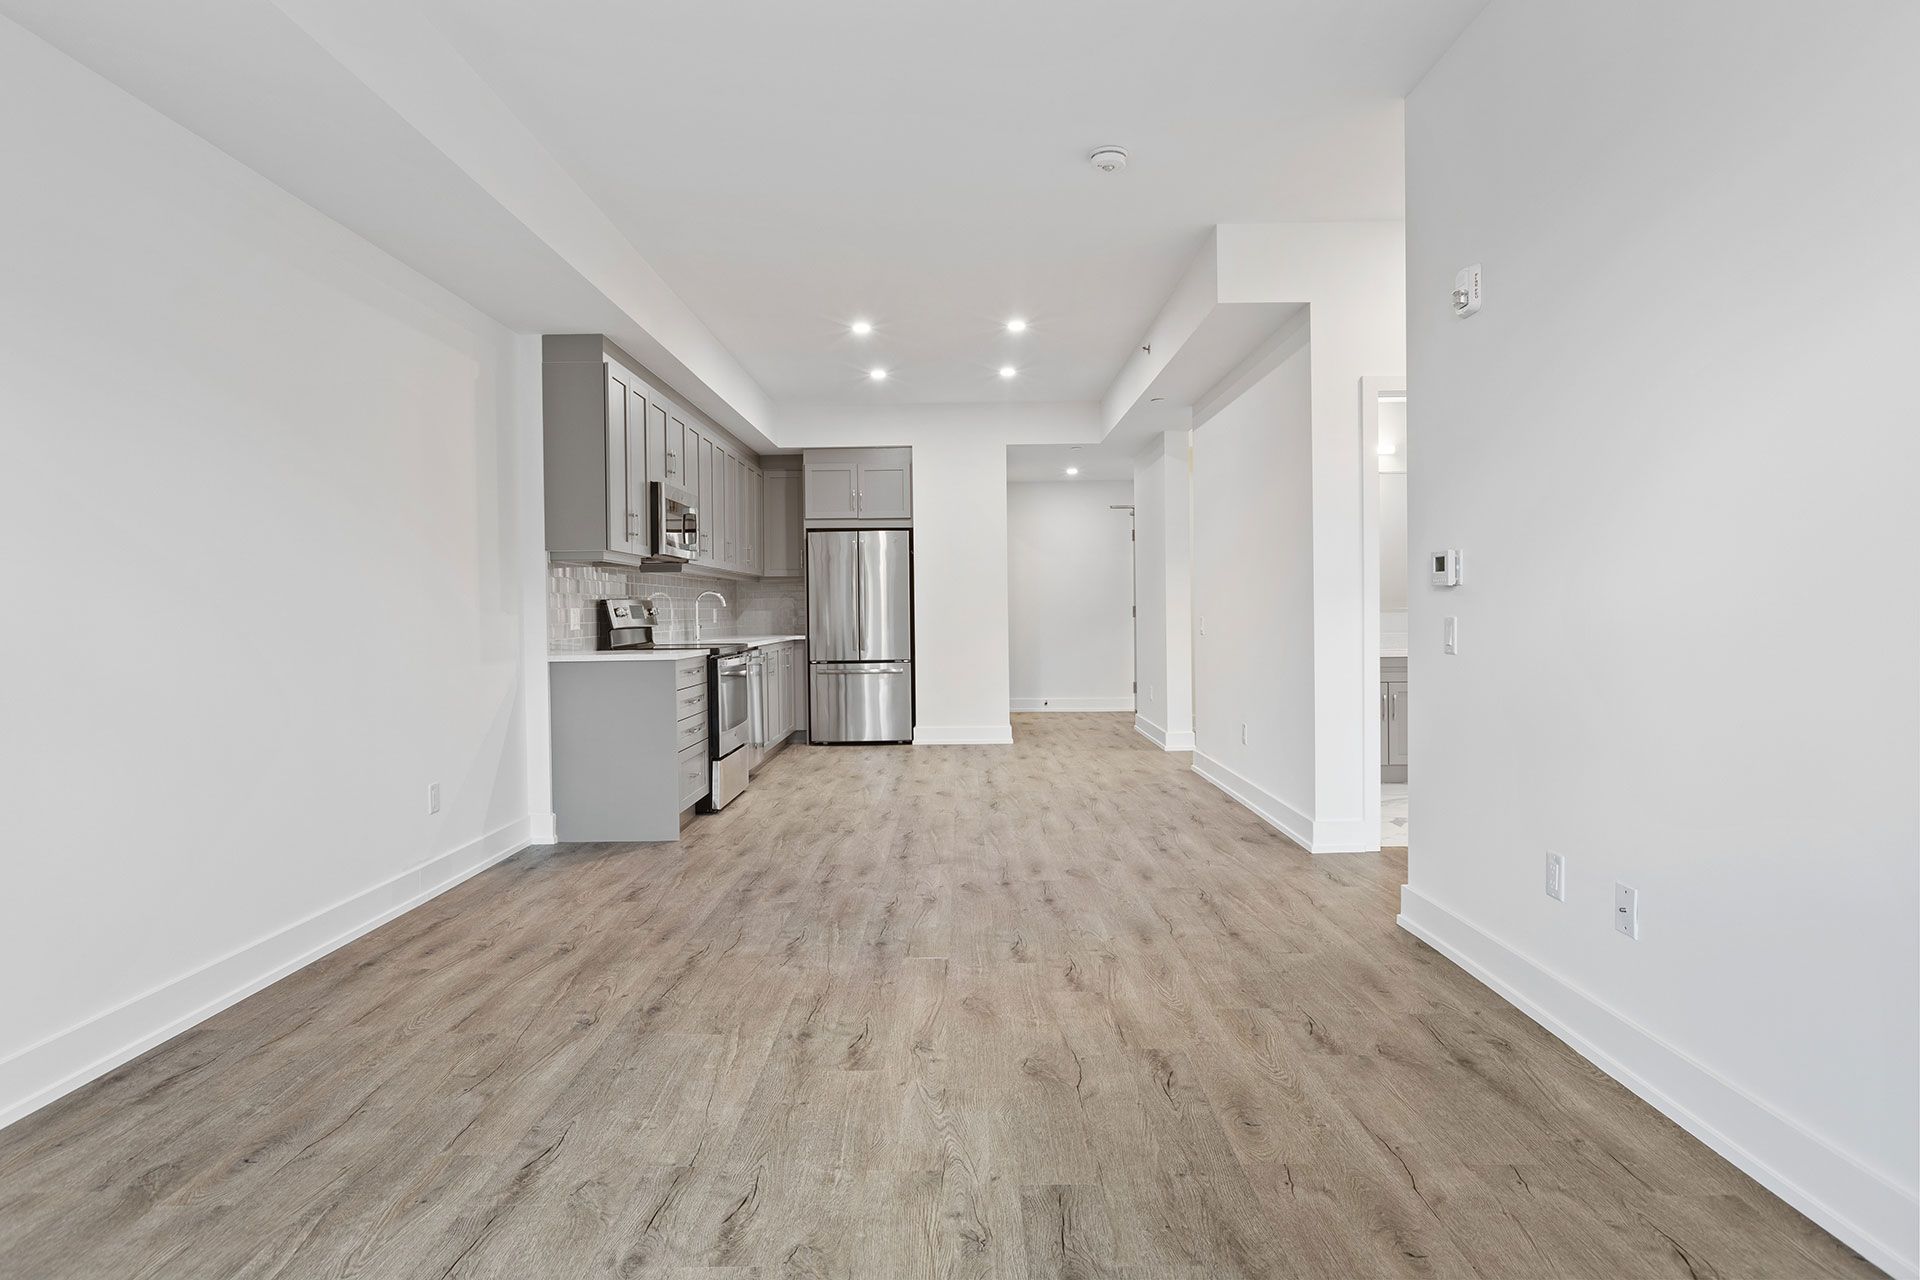
The straight wood flooring pattern, also known as the “plank” or “strip” pattern, is the most common and straightforward option. In this pattern, the flooring boards are installed parallel to each other, creating a clean and uniform look. This timeless pattern is suitable for almost any interior design style and can complement both traditional and contemporary aesthetics.
Why Choose Straight Pattern
- Versatility: The straight pattern works well in any room, from living spaces and bedrooms to hallways and kitchens.
- Ease of Installation: The simplicity of the straight pattern makes it relatively easy to install, even for DIY enthusiasts.
- Space Illusion: This pattern can create an illusion of a larger space, especially when the boards are installed parallel to the longest wall.
Materials and Tools Needed for Straight Pattern Installation
To install a straight wood flooring pattern, you will need the following materials and tools:
- Wood flooring boards: Choose the type of wood that best suits your preferences and budget.
- Underlayment: An underlayment is typically recommended for moisture protection and sound insulation.
- Moisture barrier: If installing over a concrete subfloor, a moisture barrier is necessary to prevent moisture from seeping into the flooring.
- Nails or staples: These are used to secure the flooring boards to the subfloor.
- Hammer or pneumatic nailer: Depending on your chosen method of installation, you will need a hammer or nailer to drive the nails or staples into place.
- Table saw or circular saw: These tools are essential for cutting the boards to the desired lengths.
- Measuring tape and chalk line: Accurate measurements and straight guidelines are crucial for achieving a clean and precise installation.
- Safety equipment: Don’t forget to wear safety goggles, gloves, and a dust mask to protect yourself during the installation process.
Step-by-Step Installation Process
- Preparation: Ensure that the subfloor is clean, dry, and level. Remove any existing flooring material and inspect for any damage or unevenness.
- Acclimate the wood flooring: Allow the flooring boards to acclimate to the room’s temperature and humidity for a few days before installation. Follow the manufacturer’s guidelines for acclimation time.
- Install the moisture barrier: If required, lay down a moisture barrier over the subfloor, following the manufacturer’s instructions.
- Install the underlayment: Roll out the underlayment, ensuring it covers the entire floor area. Trim any excess and secure it in place.
- Start the first row: Begin by measuring and marking a straight guideline parallel to the longest wall. This will serve as a reference for the installation.
- Lay the first board: Align the first board along the guideline, ensuring a small gap between the board and the wall for expansion. Use the appropriate method (nailing or stapling) to secure the board to the subfloor.
- Continue with subsequent rows: Fit the next board tightly against the first one, using a tapping block and hammer to ensure a snug fit. Continue installing boards row by row, staggering the end joints for stability and aesthetics.
- Cut and trim as necessary: Use a saw to cut boards to the required length for the last row or around obstacles such as doorways. Remember to leave a gap around the edges for expansion.
- Finish the installation: Once all the boards are in place, remove any excess adhesive or debris. Install baseboards or molding to cover the expansion gap and provide a finished look.
- Final touches: Sweep or vacuum the newly installed wood floor to remove any dust or debris. Apply appropriate finish or sealant, following the manufacturer’s instructions, to protect and enhance the wood’s natural beauty.
By following these steps, you can achieve a beautiful and professionally installed straight wood flooring pattern. However, if you prefer a more unique and dynamic look, exploring other installation patterns such as diagonal, herringbone, or parquet may be more appealing. Let’s dive into these patterns in the following sections.
Straight Wood Flooring Pattern: An Overview
The straight wood flooring pattern, also commonly referred to as the “plank” or “strip” pattern, is one of the most popular and widely used installation methods for wood floors. This classic pattern involves laying the flooring boards parallel to each other, creating a clean and uniform appearance. In this section, we will delve deeper into the straight wood flooring pattern, exploring its benefits and why it may be the right choice for your home.
Why Choose Straight Pattern
- Versatility: One of the key advantages of the straight wood flooring pattern is its versatility. This pattern complements various interior design styles, including traditional, contemporary, rustic, and minimalist aesthetics. Whether you have a modern urban loft or a cozy country home, the straight pattern can seamlessly blend into any space.
- Timeless Appeal: The straight pattern offers a timeless and classic look that never goes out of style. Its simplicity and clean lines contribute to a sense of elegance and sophistication, making it a popular choice for homeowners who prefer a traditional or timeless aesthetic.
- Wide Range of Wood Options: The straight pattern works well with almost any type of wood, allowing you to choose from a wide range of options. Whether you prefer the warmth of oak, the richness of walnut, or the versatility of maple, you can find a wood species that suits your taste and budget.
- Ease of Installation: If you are a DIY enthusiast or prefer to save on installation costs, the straight pattern is relatively straightforward to install compared to more intricate patterns. With proper planning and basic woodworking skills, you can successfully install a straight wood flooring pattern on your own.
- Illusion of Space: The straight pattern can create an illusion of a larger space, particularly when the boards are installed parallel to the longest wall in a room. This visual effect makes it an excellent choice for smaller rooms or areas where you want to enhance the sense of openness and spaciousness.
Materials and Tools Needed for Straight Pattern Installation
To install a straight wood flooring pattern, you will need the following materials and tools:
- Wood Flooring Boards: Choose high-quality wood flooring boards that match your preferred type of wood and desired aesthetic. Consider factors such as durability, grain pattern, and color variation.
- Underlayment: An underlayment is often recommended to provide cushioning, sound insulation, and moisture protection. Choose an underlayment suitable for your specific flooring needs and follow the manufacturer’s instructions for installation.
- Moisture Barrier: If you are installing the wood flooring over a concrete subfloor, a moisture barrier is essential to prevent moisture from seeping into the flooring. Ensure the moisture barrier is installed correctly to protect your wood flooring from potential damage.
- Nails or Staples: Depending on your preferred method of installation, you will need either nails or staples to secure the wood flooring boards to the subfloor. Choose the appropriate size and type of fasteners for your specific flooring and subflooring materials.
- Hammer or Pneumatic Nailer: Use a hammer or pneumatic nailer to drive the nails or staples into place securely. A nailer can significantly speed up the installation process and ensure consistent and accurate fastening.
- Table Saw or Circular Saw: You will need a table saw or circular saw to cut the wood flooring boards to the desired length. Ensure you have the necessary safety equipment, such as safety goggles and gloves, when operating these power tools.
- Measuring Tape and Chalk Line: Accurate measurements are crucial for a precise and professional-looking installation. Use a measuring tape and chalk line to mark guidelines and ensure straight and parallel lines during the installation process.
- Safety Equipment: Always prioritize safety when working with tools and materials. Wear safety goggles, gloves, and a dust mask to protect yourself from potential hazards, such as flying debris and sawdust.
Step-by-Step Installation Process
Here is a step-by-step guide to installing a straight wood flooring pattern:
- Preparation: Ensure the subfloor is clean, dry, and level. Remove any existing flooring material, and address any issues such as unevenness or moisture problems.
- Acclimate the Wood Flooring: Allow the wood flooring boards to acclimate to the room’s temperature and humidity for a few days before installation. Follow the manufacturer’s guidelines for acclimation time.
- Install the Moisture Barrier: If required, lay down a moisture barrier over the subfloor following the manufacturer’s instructions. This is crucial for protecting your wood flooring from moisture-related damage.
- Lay the Underlayment: Roll out the underlayment, making sure it covers the entire floor area. Trim any excess and secure the underlayment in place according to the manufacturer’s recommendations.
- Start the First Row: Measure and mark a straight guideline parallel to the longest wall in the room. This guideline will serve as a reference for the installation. Leave a small expansion gap between the flooring boards and the wall.
- Lay the First Board: Align the first flooring board along the guideline, ensuring it is straight and parallel to the wall. Use the appropriate method (nailing or stapling) to secure the board to the subfloor.
- Continue with Subsequent Rows: Fit the next board tightly against the previous one, using a tapping block and hammer to ensure a snug fit. Continue installing boards row by row, staggering the end joints for stability and aesthetics.
- Cut and Trim as Necessary: Use a table saw or circular saw to cut boards to the required length for the last row or around obstacles such as doorways. Leave a gap around the edges to allow for expansion.
- Finishing Touches: Once all the boards are in place, remove any excess adhesive or debris. Install baseboards or molding to cover the expansion gap and provide a finished look.
- Final Inspection and Maintenance: Inspect the installed flooring for any imperfections or loose boards. Follow the manufacturer’s recommendations for maintenance to ensure the longevity and beauty of your wood flooring.
By following these steps, you can achieve a beautifully installed straight wood flooring pattern that enhances the ambiance of your home. However, if you desire a more intricate or unique look, exploring other wood flooring installation patterns, such as diagonal, herringbone, or parquet, may be worth considering. Let’s explore these patterns in the following sections.
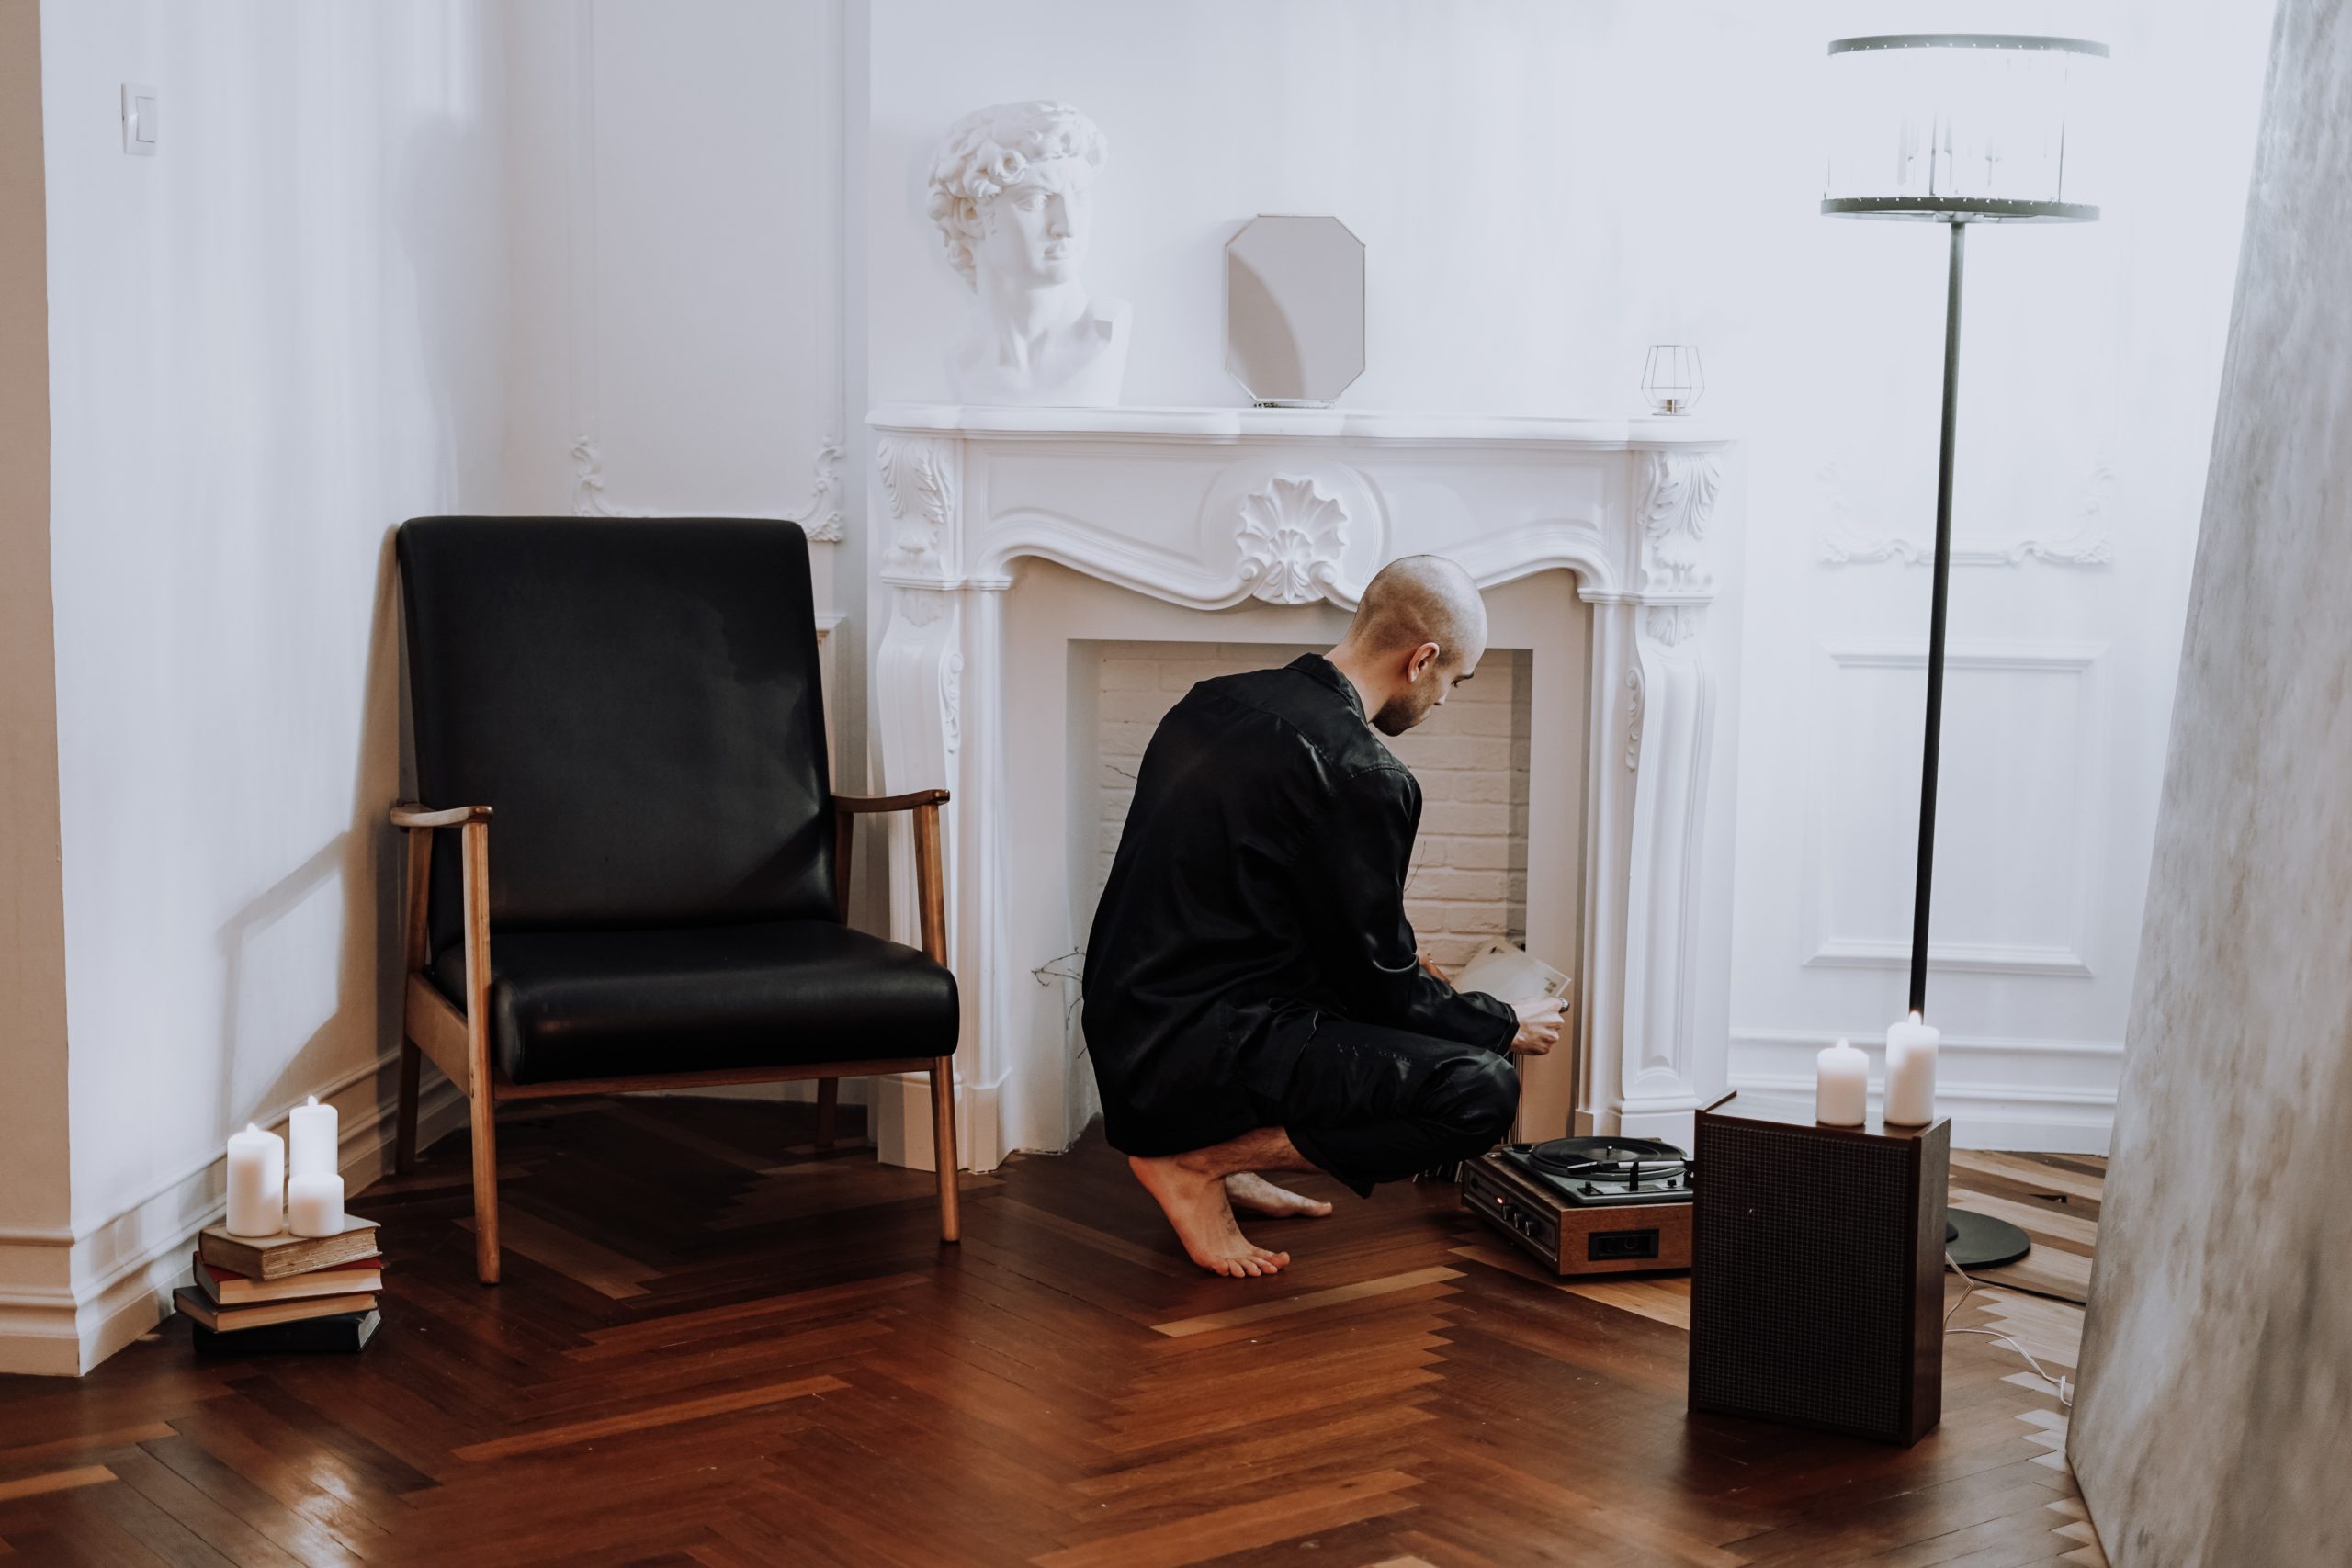
Diagonal Wood Flooring Pattern: An In-Depth Guide
The diagonal wood flooring pattern is a popular choice for those looking to add visual interest and a sense of depth to their floors. By installing the flooring boards at a 45-degree angle to the walls, this pattern creates a dynamic and unique look that can transform any space. In this section, we will explore the diagonal wood flooring pattern in detail, discussing its benefits and providing a comprehensive guide on how to achieve this stunning pattern in your home.
Benefits of Diagonal Pattern
- Enhanced Visual Appeal: The diagonal pattern adds a touch of drama and visual interest to any room. By breaking away from the traditional straight lines, it creates a dynamic and unique flooring design that can become a focal point or conversation starter.
- Illusion of Space: Similar to the straight pattern, the diagonal pattern can create an illusion of a larger room. The diagonal lines draw the eye outward, making the space appear more expansive and open.
- Camouflaging Imperfections: If you have a room with irregular or uneven walls, the diagonal pattern can help camouflage these imperfections. The angled installation can make slight variations in wall alignment less noticeable.
- Unique Aesthetic: The diagonal pattern offers a distinct and unconventional aesthetic, making it an excellent choice for those seeking a flooring design that stands out from the crowd. It can add character and personality to any room, whether it’s a modern living space or a traditional dining area.
Necessary Supplies for Diagonal Pattern Installation
To install a diagonal wood flooring pattern, you will need the following supplies:
- Wood Flooring Boards: Choose high-quality wood flooring boards that are suitable for the desired pattern and match your preferred wood type and color. Consider factors such as durability, grain pattern, and color variation.
- Underlayment: An underlayment is typically recommended for moisture protection and sound insulation. Select an underlayment suitable for diagonal pattern installation and follow the manufacturer’s instructions for installation.
- Moisture Barrier: If your subfloor is concrete, a moisture barrier is essential to prevent moisture from seeping into the wood flooring. Ensure the moisture barrier is installed correctly to protect your flooring from potential damage.
- Nails or Staples: Choose the appropriate size and type of fasteners to secure the wood flooring boards to the subfloor. The diagonal pattern may require longer fasteners to accommodate the angled installation.
- Hammer or Pneumatic Nailer: Use a hammer or pneumatic nailer to drive the nails or staples securely into place. Ensure you have the necessary safety equipment, such as safety goggles and gloves, when using these tools.
- Table Saw or Circular Saw: You will need a table saw or circular saw to cut the wood flooring boards to the desired length and angle. Ensure you have the necessary safety equipment and follow proper cutting techniques.
- Measuring Tape and Chalk Line: Accurate measurements and guidelines are crucial for achieving a precise and professional-looking diagonal pattern installation. Use a measuring tape and chalk line to mark guidelines and ensure straight and parallel lines during the installation process.
- Safety Equipment: Always prioritize safety when working with tools and materials. Wear safety goggles, gloves, and a dust mask to protect yourself from potential hazards, such as flying debris and sawdust.
Detailed Installation Procedure
Here is a step-by-step guide to installing a diagonal wood flooring pattern:
- Preparation: Ensure the subfloor is clean, dry, and level. Remove any existing flooring material, and address any issues such as unevenness or moisture problems.
- Acclimate the Wood Flooring: Allow the wood flooring boards to acclimate to the room’s temperature and humidity for a few days before installation. Follow the manufacturer’s guidelines for acclimation time.
- Install the Moisture Barrier: If required, lay down a moisture barrier over the subfloor following the manufacturer’s instructions. This is crucial for protecting your wood flooring from moisture-related damage.
- Lay the Underlayment: Roll out the underlayment, making sure it covers the entire floor area. Trim any excess and secure the underlayment in place according to the manufacturer’s recommendations.
- Determine the Angle: Decide on the desired angle for your diagonal pattern. The most common angle is 45 degrees, but you can experiment with different angles for a unique look.
- Mark the Starting Line: Measure the midpoint of one wall and use a chalk line to mark the starting line at the desired angle. Ensure the line is straight and parallel to the walls.
- Lay the First Board: Align the first flooring board along the starting line, ensuring it is straight and at the desired angle. Use the appropriate method (nailing or stapling) to secure the board to the subfloor.
- Continue with Subsequent Rows: Fit the next board tightly against the previous one, aligning it at the same angle. Use a tapping block and hammer to ensure a snug fit. Continue installing boards row by row, staggering the end joints for stability and aesthetics.
- Cut and Trim as Necessary: Use a table saw or circular saw to cut boards to the required length and angle for the last row or around obstacles such as doorways. Leave a gap around the edges to allow for expansion.
- Finishing Touches: Once all the boards are in place, remove any excess adhesive or debris. Install baseboards or molding to cover the expansion gap and provide a finished look.
- Final Inspection and Maintenance: Inspect the installed flooring for any imperfections or loose boards. Follow the manufacturer’s recommendations for maintenance to ensure the longevity and beauty of your wood flooring.
By following these steps, you can achieve a stunning diagonal wood flooring pattern that adds a unique and visually appealing element to your home. If you’re looking for more intricate and sophisticated patterns, such as herringbone or parquet, continue reading the following sections as we explore these options in detail.
Herringbone Wood Flooring Pattern: A Detailed Look
The herringbone wood flooring pattern is a timeless and elegant choice that adds a touch of sophistication to any space. With its distinctive V-shaped design, the herringbone pattern creates a visually striking and intricate look that can elevate the style of your home. In this section, we will explore the herringbone wood flooring pattern in detail, discussing its benefits and providing a comprehensive guide on how to achieve this stunning pattern in your home.
Why Opt for Herringbone Pattern
- Classic Elegance: The herringbone pattern exudes a classic and refined aesthetic that never goes out of style. It adds a touch of elegance and luxury to any room, making it a popular choice for homeowners who appreciate timeless design.
- Visual Interest: The intricate V-shaped pattern of the herringbone creates visual interest and draws the eye towards the flooring. It adds depth and dimension to the space, making it a focal point and conversation starter.
- Versatility: Despite its classic appeal, the herringbone pattern can be used in various design styles, from traditional to contemporary. It complements both formal and casual settings, allowing you to adapt the pattern to your personal taste and interior design preferences.
- Illusion of Space: Similar to other wood flooring patterns, the herringbone pattern can create an illusion of a larger space. The diagonal lines create a sense of movement and openness, making the room appear more expansive.
Tools and Materials Required for Herringbone Pattern Installation
To install a herringbone wood flooring pattern, you will need the following tools and materials:
- Wood Flooring Boards: Choose high-quality wood flooring boards that are suitable for the herringbone pattern. Consider factors such as durability, grain pattern, and color variation. It’s common to use narrower boards to achieve the desired herringbone effect.
- Underlayment: An underlayment is typically recommended for moisture protection, sound insulation, and added stability. Select an underlayment suitable for herringbone pattern installation and follow the manufacturer’s instructions for installation.
- Moisture Barrier: If your subfloor is concrete, a moisture barrier is essential to prevent moisture from seeping into the wood flooring. Ensure the moisture barrier is installed correctly to protect your flooring from potential damage.
- Nails or Staples: Choose the appropriate size and type of fasteners to secure the wood flooring boards to the subfloor. The herringbone pattern may require longer fasteners to accommodate the angled installation.
- Hammer or Pneumatic Nailer: Use a hammer or pneumatic nailer to drive the nails or staples securely into place. Ensure you have the necessary safety equipment, such as safety goggles and gloves, when using these tools.
- Miter Saw or Table Saw: You will need a miter saw or table saw to cut the wood flooring boards at the required angles for the herringbone pattern. Ensure you have the necessary safety equipment and follow proper cutting techniques.
- Measuring Tape and Chalk Line: Accurate measurements and guidelines are crucial for achieving a precise and professional-looking herringbone pattern installation. Use a measuring tape and chalk line to mark guidelines and ensure straight and parallel lines during the installation process.
- Safety Equipment: Always prioritize safety when working with tools and materials. Wear safety goggles, gloves, and a dust mask to protect yourself from potential hazards, such as flying debris and sawdust.
Installation Process Explained
Here is a step-by-step guide to installing a herringbone wood flooring pattern:
- Preparation: Ensure the subfloor is clean, dry, and level. Remove any existing flooring material, and address any issues such as unevenness or moisture problems.
- Acclimate the Wood Flooring: Allow the wood flooring boards to acclimate to the room’s temperature and humidity for a few days before installation. Follow the manufacturer’s guidelines for acclimation time.
- Install the Moisture Barrier: If required, lay down a moisture barrier over the subfloor following the manufacturer’s instructions. This is crucial for protecting your wood flooring from moisture-related damage.
- Lay the Underlayment: Roll out the underlayment, making sure it covers the entire floor area. Trim any excess and secure the underlayment in place according to the manufacturer’s recommendations.
- Determine the Angle and Starting Point: Decide on the desired angle for your herringbone pattern. Traditionally, the angle is set at 45 degrees. Mark the starting point on the floor using a chalk line.
- Lay the First Board: Begin at the starting point and lay the first flooring board at the desired angle. Use the appropriate method (nailing or stapling) to secure the board to the subfloor.
- Continue with Subsequent Rows: Lay the next board at the opposite angle to create the V-shaped herringbone pattern. Fit the boards tightly together, using a tapping block and hammer to ensure a snug fit. Continue installing boards row by row, alternating the angles to create the herringbone effect.
- Cut and Trim as Necessary: Use a miter saw or table saw to cut boards at the required angles for the last row or around obstacles such as doorways. Leave a gap around the edges to allow for expansion.
- Finishing Touches: Once all the boards are in place, remove any excess adhesive or debris. Install baseboards or molding to cover the expansion gap and provide a finished look.
- Final Inspection and Maintenance: Inspect the installed flooring for any imperfections or loose boards. Follow the manufacturer’s recommendations for maintenance to ensure the longevity and beauty of your wood flooring.
By following these steps, you can achieve a stunning herringbone wood flooring pattern that adds a touch of elegance and sophistication to your home. If you’re looking for more unique and intricate patterns, such as parquet, continue reading the following section as we explore this option in detail.
Parquet Wood Flooring Pattern: A Comprehensive Guide
The parquet wood flooring pattern is a classic and intricate design that has been used for centuries to create stunning and unique floors. This pattern consists of small wood pieces arranged in geometric shapes, such as squares, rectangles, or diamonds, to form a mosaic-like effect. In this section, we will take a closer look at the parquet wood flooring pattern, exploring its advantages and providing a comprehensive guide on how to achieve this intricate pattern in your home.
Advantages of Parquet Pattern
- Unique and Artistic: The parquet pattern offers a truly unique and artistic flooring design. With its intricate geometric shapes and patterns, it adds a sense of sophistication and elegance to any space. The beauty of parquet lies in its ability to create a visually stunning focal point that complements various interior design styles.
- Versatility: Parquet flooring is available in a variety of wood species, colors, and patterns, allowing you to customize the look to match your personal style and the existing decor of your home. Whether you prefer a traditional herringbone pattern or a more contemporary design, parquet offers endless possibilities.
- Durability: Parquet flooring is known for its durability and longevity. The small wood pieces are tightly fitted and bonded together, creating a strong and stable surface that can withstand heavy foot traffic and everyday wear and tear.
- Easy to Maintain: Parquet flooring is relatively easy to maintain. Regular sweeping or vacuuming, along with occasional damp mopping, will keep the floor clean and free from dust and debris. Additionally, parquet floors can be refinished to restore their original beauty if they become worn or scratched over time.
Essential Supplies for Parquet Pattern Installation
To install a parquet wood flooring pattern, you will need the following supplies:
- Parquet Flooring Pieces: Choose high-quality parquet flooring pieces that fit your desired pattern and design. Consider the wood species, color, and size of the pieces to achieve the desired aesthetic. Parquet flooring is typically available in pre-assembled panels or individual pieces.
- Underlayment: An underlayment is recommended for moisture protection, sound insulation, and added stability. Select an underlayment suitable for parquet pattern installation and follow the manufacturer’s instructions for installation.
- Moisture Barrier: If your subfloor is concrete, a moisture barrier is essential to prevent moisture from seeping into the wood flooring. Ensure the moisture barrier is installed correctly to protect your flooring from potential damage.
- Adhesive: Choose a high-quality adhesive suitable for parquet installation. The adhesive should be compatible with both the subfloor and the parquet flooring pieces. Follow the manufacturer’s instructions for proper application.
- Notched Trowel: A notched trowel is necessary for spreading the adhesive evenly and creating the proper ridges for secure adhesion.
- Rubber Mallet: Use a rubber mallet to gently tap the parquet pieces into place, ensuring they are level and securely bonded to the subfloor.
- Measuring Tape and Chalk Line: Accurate measurements and guidelines are crucial for achieving a precise and professional-looking parquet pattern installation. Use a measuring tape and chalk line to mark guidelines and ensure straight and parallel lines during the installation process.
- Safety Equipment: Always prioritize safety when working with tools and materials. Wear safety goggles, gloves, and a dust mask to protect yourself from potential hazards, such as flying debris and sawdust.
Step-by-Step Installation Guide
Here is a step-by-step guide to installing a parquet wood flooring pattern:
- Preparation: Ensure the subfloor is clean, dry, and level. Remove any existing flooring material, and address any issues such as unevenness or moisture problems.
- Acclimate the Parquet Flooring: Allow the parquet flooring pieces to acclimate to the room’s temperature and humidity for a few days before installation. Follow the manufacturer’s guidelines for acclimation time.
- Install the Moisture Barrier: If required, lay down a moisture barrier over the subfloor following the manufacturer’s instructions. This is crucial for protecting your wood flooring from moisture-related damage.
- Lay the Underlayment: Roll out the underlayment, making sure it covers the entire floor area. Trim any excess and secure the underlayment in place according to the manufacturer’s recommendations.
- Plan the Parquet Pattern: Determine the desired parquet pattern and layout. Consider factors such as room size, shape, and existing architectural features. Mark guidelines using a chalk line to ensure accurate placement of the parquet pieces.
- Spread Adhesive: Use a notched trowel to spread a layer of adhesive over a small section of the subfloor, following the manufacturer’s instructions. Ensure the adhesive is evenly spread and has ridges for secure adhesion.
- Lay the Parquet Pieces: Begin at one corner of the room and lay the parquet pieces according to the desired pattern and layout. Use a rubber mallet to gently tap each piece into place, ensuring they are level and securely bonded to the subfloor.
- Continue with Subsequent Sections: Work in small sections, spreading adhesive and laying parquet pieces until the entire floor is covered. Take care to maintain the desired pattern and ensure a tight fit between the pieces.
- Trim and Cut as Necessary: Use a saw or other cutting tools to trim and cut parquet pieces to fit around edges, corners, or obstacles such as doorways. Ensure precise measurements and clean cuts for a professional finish.
- Finishing Touches: Once all the parquet pieces are in place, remove any excess adhesive or debris. Install baseboards or molding to cover the expansion gap and provide a finished look.
- Final Inspection and Maintenance: Inspect the installed parquet flooring for any imperfections or loose pieces. Follow the manufacturer’s recommendations for maintenance to ensure the longevity and beauty of your wood flooring.
By following these steps, you can achieve a stunning parquet wood flooring pattern that adds a touch of elegance and uniqueness to your home. With its intricate design and timeless appeal, parquet flooring is sure to impress and become a cherished feature in your living space.
Conclusion: Choosing the Right Wood Flooring Pattern for Your Home
Choosing the right wood flooring pattern for your home is an important decision that can greatly impact the overall aesthetic and ambiance of your living space. Each pattern, whether it’s the classic straight pattern, the dynamic diagonal pattern, the elegant herringbone pattern, or the intricate parquet pattern, offers its own unique characteristics and benefits.
When considering which pattern to choose, it’s important to take into account various factors such as your personal style, the architectural features of your home, and the existing decor. Think about the atmosphere you want to create and how the wood flooring pattern can contribute to that vision. Additionally, consider the practical aspects such as maintenance requirements, durability, and the level of complexity for installation.
The straight wood flooring pattern is a versatile and timeless option that works well in various design styles and spaces. It offers a clean and uniform look, making it suitable for both traditional and contemporary aesthetics. The diagonal pattern adds visual interest and can create an illusion of a larger space, making it ideal for those seeking a more dynamic and open feel. The herringbone pattern brings a touch of sophistication and elegance, making it a perfect choice for those who appreciate a classic and refined look. Lastly, the parquet pattern offers a unique and artistic design, allowing you to create a truly one-of-a-kind floor that becomes a focal point in your home.
Consider your personal preferences, the architectural style of your home, and the desired atmosphere when making your decision. It may also be helpful to consult with professionals or seek inspiration from design magazines and online resources to find the perfect wood flooring pattern that aligns with your vision.
Remember, the installation process for each pattern requires careful planning and attention to detail. Ensure that you have the necessary tools, materials, and knowledge to achieve a professional and long-lasting result. If you’re unsure about the installation process, it is always recommended to seek the assistance of a professional flooring installer.
In conclusion, the wood flooring pattern you choose can significantly enhance the beauty and character of your home. Whether you opt for the classic straight pattern, the dynamic diagonal pattern, the elegant herringbone pattern, or the intricate parquet pattern, each offers its own unique charm and appeal. By carefully considering your personal style, the architectural features of your home, and the desired ambiance, you can select the perfect wood flooring pattern that transforms your living space into a place of beauty and comfort.