Whether you’re a homeowner looking to upgrade your flooring or a DIY enthusiast eager to tackle a new project, this comprehensive guide to laminate tile flooring will equip you with the knowledge and skills you need to achieve beautiful and long-lasting results. So, let’s dive in and explore the world of laminate tile flooring together.
Understanding Laminate Tile Flooring: Basics and Benefits
Laminate tile flooring is a synthetic flooring product that mimics the appearance of real tile. It is composed of multiple layers that are fused together using a lamination process. The top layer, known as the wear layer, is a tough and transparent layer that provides protection against scratches, stains, and fading. Beneath the wear layer, there is a printed layer that features a high-resolution image of tile patterns, which gives the laminate tile flooring its realistic look. The core layer is made of high-density fiberboard (HDF) or medium-density fiberboard (MDF), providing stability and durability.
One of the primary benefits of laminate tile flooring is its affordability. Compared to real tile flooring, laminate tile flooring is considerably less expensive, making it an attractive option for budget-conscious homeowners. Additionally, laminate tile flooring is relatively easy to install, which can save on installation costs if you choose to do it yourself.
Another key advantage of laminate tile flooring is its durability. The wear layer protects against scratches, stains, and fading, making it suitable for high-traffic areas in the home. It is also resistant to moisture, making it a great choice for kitchens, bathrooms, and other areas where water exposure is common.
Laminate tile flooring offers a wide range of styles and designs, allowing homeowners to achieve the look they desire. From contemporary to traditional, there are countless options available, including various tile patterns, colors, and textures. Whether you prefer the look of ceramic, porcelain, or stone tiles, there is a laminate tile flooring option to suit your aesthetic preferences.
In addition to its affordability, durability, and versatility in design, laminate tile flooring is also relatively easy to maintain. Regular sweeping or vacuuming, along with occasional mopping, is usually sufficient to keep the flooring clean and looking its best. Unlike real tile, laminate tile flooring does not require sealing or special cleaning products, simplifying the maintenance process.
Understanding the basics and benefits of laminate tile flooring is crucial before making a decision to install it in your home. By considering its affordability, durability, design options, and ease of maintenance, you can confidently choose laminate tile flooring as a practical and stylish flooring solution for your space.
How to Choose the Right Laminate Tile Flooring
Choosing the right laminate tile flooring is essential to ensure that it not only meets your aesthetic preferences but also suits the specific needs of your space. Here are several factors to consider when selecting laminate tile flooring:
Consider Your Room’s Needs and Style
Before diving into the various options available, assess the specific requirements of the room where you plan to install laminate tile flooring. Consider factors such as the level of foot traffic, exposure to moisture, and the overall style and ambiance you want to create.
For high-traffic areas like entryways, hallways, and living rooms, opt for laminate tile flooring with a higher AC rating. The AC rating measures the durability of the flooring, and a higher rating indicates better resistance to wear and tear.
In rooms where moisture is a concern, such as kitchens or bathrooms, choose laminate tile flooring with a moisture-resistant core and a water-resistant top layer. This will help protect against potential water damage and ensure the longevity of your flooring.
Additionally, consider the style and theme of your space. Are you aiming for a modern, contemporary look or a more rustic and traditional feel? Take into account the existing color palette, furniture, and decor to select laminate tile flooring that complements the overall aesthetic of the room.
Understanding Different Types of Laminate Tiles
Laminate tile flooring comes in various types, each offering unique characteristics and benefits. Here are some common types to consider:
- Ceramic Tile Look: These laminate tiles mimic the appearance of ceramic tiles, complete with grout lines. They are a popular choice for those seeking a classic and timeless look.
- Porcelain Tile Look: This type of laminate tile resembles porcelain tiles, offering a sleek and elegant look. It is often available in larger tile formats, creating a seamless and contemporary appearance.
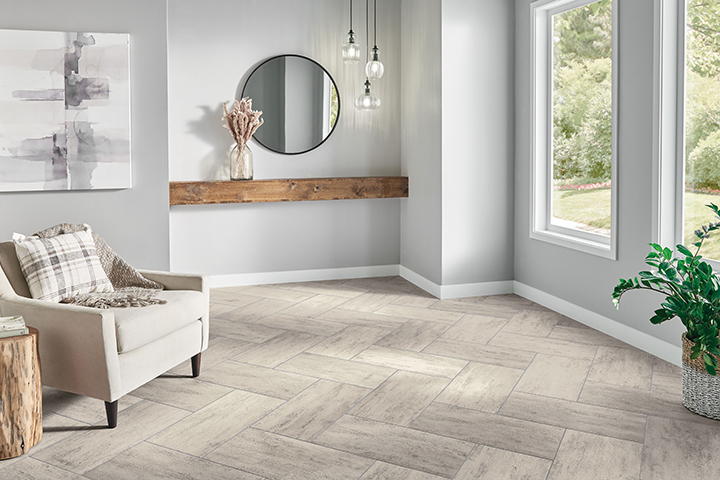
- Stone Tile Look: If you desire the natural beauty of stone tiles without the high cost and maintenance, laminate tiles with a stone tile look are an excellent option. They replicate the texture and patterns of various stone materials, such as marble, slate, or travertine.
Choosing the Right Color and Texture
The color and texture of your laminate tile flooring play a significant role in the overall aesthetic of your space. Consider the following tips when making your selection:
- Lighter-colored laminate tiles can make a room appear more spacious and airy, while darker tones can add warmth and coziness.
- Consider the existing color scheme in your room. Choose laminate tiles that either complement or contrast with the colors of your walls, furniture, and decor.
- Textured laminate tiles can add depth and authenticity to the flooring, mimicking the feel of real tiles. Smooth finishes, on the other hand, provide a sleek and polished look.
By considering your room’s needs, understanding the different types of laminate tiles available, and selecting the right color and texture, you can confidently choose the perfect laminate tile flooring that enhances the beauty and functionality of your space.
Installation Process of Laminate Tile Flooring
Installing laminate tile flooring may seem like a daunting task, but with the right tools, materials, and a step-by-step guide, you can achieve professional-looking results. Here is a comprehensive overview of the installation process:
Required Tools and Materials
Before starting the installation, gather the necessary tools and materials:
- Laminate tile flooring
- Underlayment
- Tape measure
- Spacers
- Utility knife
- Hammer
- Pry bar
- Tapping block
- Pull bar
- Pencil
- Safety goggles
- Knee pads
Ensure that you have all the essential tools and materials ready before beginning the installation process.
Preparation of the Floor
- Remove the existing flooring: If there is existing flooring, such as carpet or vinyl, remove it completely. Use a pry bar and hammer as necessary.
- Prepare the subfloor: Ensure that the subfloor is clean, dry, level, and free from any debris. Repair any uneven areas or damage before proceeding. If needed, install a moisture barrier or underlayment for added protection and sound insulation.
- Acclimate the laminate tiles: Allow the laminate tiles to acclimate to the room’s temperature and humidity for at least 48 hours. This step helps prevent expansion or contraction after installation.
Laying the Laminate Tiles
- Start with a reference line: Measure and mark a reference line perpendicular to the longest wall of the room. This line will serve as a guide for laying the first row of laminate tiles.
- Install the underlayment: Roll out the underlayment, ensuring that it covers the entire floor area. Trim any excess and secure the underlayment in place using tape.
- Begin laying the first row: Place spacers along the reference line to create a small gap between the tiles and the wall. Start in one corner of the room and lay the first laminate tile, interlocking it with the second tile. Continue laying the first row, ensuring the tiles are securely locked together.
- Continue with subsequent rows: For the second row and beyond, use the pull bar and tapping block to connect the tiles securely. Stagger the joints, ensuring that the end joints are at least 6 inches apart between rows.
- Cut tiles to fit: Measure and mark tiles that need to be cut to fit around obstacles or along the edges of the room. Use a utility knife to make precise cuts, ensuring a snug fit.
- Complete the installation: Continue laying the laminate tiles row by row until the entire floor is covered. Use spacers to maintain consistent gaps between the tiles and the walls.
Finishing Touches
- Install baseboards and trim: After the laminate tile flooring is installed, reinstall or install new baseboards and trim to cover the gaps along the walls. This step provides a finished look and conceals the expansion gap.
- Remove spacers: Remove the spacers once the installation is complete. These spacers were used to create expansion gaps, allowing the laminate tiles to adjust to temperature and humidity changes.
By following these steps, you can successfully install laminate tile flooring in your space. Take your time, follow the manufacturer’s instructions, and ensure proper acclimation and preparation for the best results.
Maintaining Your Laminate Tile Flooring
Maintaining your laminate tile flooring is crucial to preserve its appearance, durability, and longevity. With proper care and regular cleaning, you can keep your laminate tile flooring looking fresh and beautiful. Here are some essential maintenance tips to follow:
Routine Cleaning Tips
- Sweeping or vacuuming: Regularly sweep or vacuum your laminate tile flooring to remove dirt, dust, and debris. Use a soft-bristle broom or a vacuum cleaner with a brush attachment to avoid scratching the surface.
- Damp mopping: Periodically damp mop your laminate tile flooring to remove stubborn dirt or spills. Use a well-wrung mop or a microfiber mop with a mild, non-abrasive laminate floor cleaner. Avoid excessive water, as laminate flooring is not designed to withstand excessive moisture.
- Wipe up spills promptly: Accidents happen, so it’s important to wipe up any spills immediately. Use a soft, absorbent cloth or paper towel to blot the spill, starting from the edges and working your way towards the center.
Dealing with Scratches and Dents
- Prevent scratches: Place felt pads or furniture glides under the legs of furniture to prevent scratches when moving or rearranging items. Avoid dragging heavy objects across the laminate tile flooring.
- Repair minor scratches: For minor scratches, use a laminate floor repair kit or a touch-up marker that matches the color of your flooring. Apply the repair solution to the scratch, following the manufacturer’s instructions.
- Conceal small dents: To conceal small dents, use a laminate floor filler or putty. Apply the filler to the affected area, smooth it with a putty knife, and wipe away any excess.
Preventing Damage
- Use protective mats: Place doormats or rugs at entryways to trap dirt and prevent it from being tracked onto the laminate tile flooring. Ensure that the mats have a non-slip backing to prevent slipping accidents.
- Avoid excessive moisture: While laminate tile flooring is moisture-resistant, it is still important to clean up any spills promptly and avoid excessive moisture. Use mats or rugs in areas prone to moisture, such as near sinks or in bathrooms.
- Protect from sunlight: Prolonged exposure to direct sunlight can cause fading and discoloration. Use curtains, blinds, or UV-protective window films to minimize the impact of sunlight on your flooring.
By following these maintenance tips, you can keep your laminate tile flooring looking its best for years to come. Regular cleaning, prompt spill cleanup, and preventative measures will help maintain its appearance and extend its lifespan.
Repair and Replacement of Laminate Tile Flooring
Over time, laminate tile flooring may encounter wear and tear or experience damage that requires repair or replacement. Here are some steps to help you identify and address common issues with laminate tile flooring:
Identifying Damaged Tiles
- Inspect the flooring: Regularly inspect your laminate tile flooring for any signs of damage, such as cracks, chips, or warping. Pay attention to areas with heavy foot traffic or exposure to moisture, as they are more prone to damage.
- Check for loose tiles: Gently press on the tiles to check for any movement or looseness. Loose tiles can indicate an issue with the locking mechanism or subfloor.
- Look for discoloration or stains: Discoloration or staining on the laminate tiles may be a result of water damage or chemical spills.
Repairing Minor Damages
- Fixing small chips or scratches: For minor chips or scratches, you can use a laminate repair kit that matches the color of your flooring. Apply the repair solution to the damaged area according to the manufacturer’s instructions.
- Addressing water damage: If you notice any water damage, such as swelling or warping of the tiles, it is essential to identify and address the source of the moisture. Repair or replace the damaged tiles and ensure that the underlying subfloor is dry before installing new tiles.
- Dealing with stains: For stubborn stains, try using a mild cleaner specifically designed for laminate flooring. Apply the cleaner to a soft cloth and gently rub the stained area. Avoid using abrasive cleaners or scrub brushes that can damage the surface of the tiles.
Replacing Damaged Tiles
- Remove the damaged tile: Start by removing the baseboard or trim around the damaged tile. Use a utility knife to cut through the caulk or adhesive that may be holding the tile in place. Carefully pry up the damaged tile using a pry bar or putty knife.
- Prepare the area: Clean the subfloor and remove any adhesive residue or debris. Ensure that the subfloor is smooth and level to ensure a proper installation.
- Install the new tile: Measure and cut the replacement tile to fit the empty space. Apply a thin layer of adhesive to the back of the tile and carefully place it in the vacant spot. Use a rolling pin or a block of wood to ensure proper adhesion and to level the tile with the surrounding ones.
- Replace the baseboard or trim: Once the new tile is securely in place, reinstall the baseboard or trim to cover the expansion gap and provide a finished appearance.
By promptly identifying and addressing damaged tiles, you can maintain the overall integrity and appearance of your laminate tile flooring. Whether it’s repairing minor issues or replacing damaged tiles, following these steps will help you restore the beauty and functionality of your flooring.